SalesSuite Scheduler: Extensive Guide
Product
Here is an in-depth guide on how to set up your account on Sales-Suite Scheduler.
By
Himasha TWC
11/20/2023, 12:00:00 AM
By
Himasha TWC
11/20/2023, 12:00:00 AM
The Signup Flow
1. Welcome to Scheduler! As you open your web application or mobile application, you can expect a login screen where you can enter your information and select a login email. Input your name, phone number, and email address, and then click to agree to Scheduler’s terms and conditions. Click ‘Next’ to proceed.
2. If you don't already have an account, you can make one after selecting "business" or "personal" as the initial profile type. First, choose whether you will be using Scheduler for business/commercial or for personal work use. If you select a personal account, input your personal details such as name, address, and location, however, if you wish to select a business account, enter your company details instead of your personal details. This includes your company’s name, number of employees, address lines 1 and 2, city, state/province, zip code, and finally select your country from the drop-down list. Click ‘Next’ to proceed.
3. Choose your plan! Since there is only one package available under a personal plan, you can then select this plan, and proceed to confirm your email for verification and set up a password. If you opt for a business plan, you have the option of choosing from two packages under your business account. Select your preferred plan according to what suits you the best, and then once again, proceed to the email verification confirmation and password setup. Keep in mind that the business plan has more options than the personal plan does! For any support, you can visit the Help Desk by clicking on the given link at the bottom of your screen.
4. An additional feature we offer is that you can create your own landing page with Scheduler. Choose between our pre-designed templates and customize them as you prefer. Whether you are a Personal Package or Business Package user, you are entitled to the landing page option.
(i) First, select your favourite pre-designed template from the Scheduler’s template gallery. Scheduler offers a collection of templates to complement different branding preferences.
(ii) Then, customize the template according to your branding preference by including a profile picture, introduction/ welcome message, contact details, and links to your social media accounts and other websites.
(iii) Now, your public page is created, and wait till we finish setting things up for you! Relax in front of the loading screen, which also happens to be lounging. It looks something like this:

The Onboarding Process
Congratulations! Your account is now ready for use! It should look something like this:
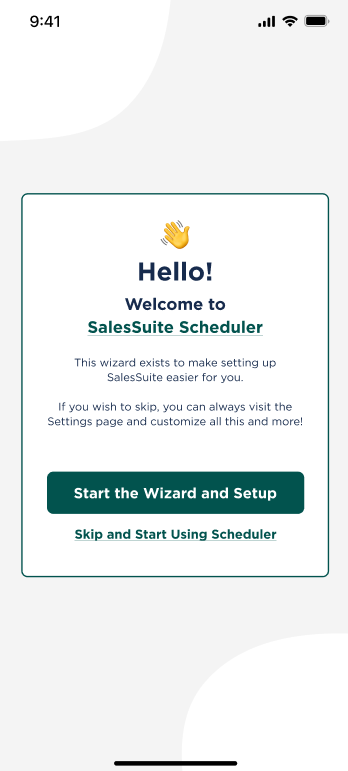
1. You can opt for starting the Wizard and setting up, or skip this process and directly start using Scheduler. Now that you have set up your account, you can choose to share your links to begin using Scheduler. However, if you have selected a business package, you are entitled to additional plug-and-play settings. If you choose to move forward, you will need to enter your preferences to set up your account. This includes setting your details through the drop-down lists, such as your time zone, time format (12-hour or 24-hour clock), date format (DD/MM/YYYY), and general settings such as your currency. Make sure to click ‘Save and Continue." This information will be vital when synchronizing your time with other schedules, so keep a keen eye out for it. Click "Save and Continue" to proceed.
2. Now, you can successfully import your contacts. With this, you can manually import within the app. Depending on your preference you can select ‘Download this format’ and ‘Import Contacts’. Then click ‘Save and Continue’. Importing a CSV file, either from Google Sheets or Microsoft Excel, is a simple way to sync your contact list.
3. It's time to begin adding your users! Select ‘Add your First User’. You can always add more users later on too. For example, if you're putting together a work team or teaching a group of students, you must start by adding their general information, such as first name, last name, job title, and email address, and you can even upload a profile picture of them. You may also select their authority level by clicking on your preferred user type, for instance, you can select ‘Admin’ to allow another user to have control over the meeting settings as well. You can now choose to save your data and add more users or save and continue.
4. You can view all your users after adding them all, it should appear like this:
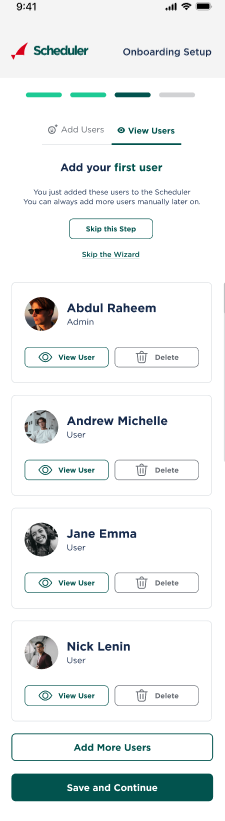
5. You can choose to view users by clicking on their profiles individually as well.
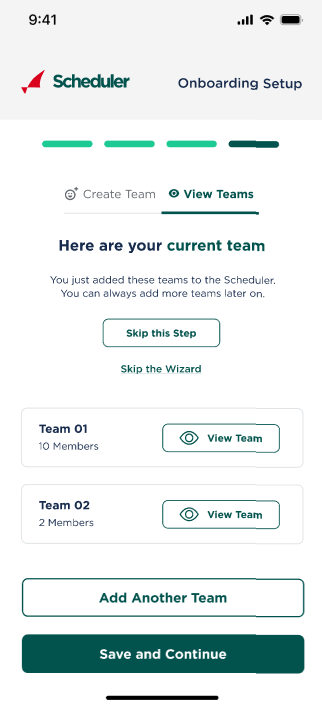
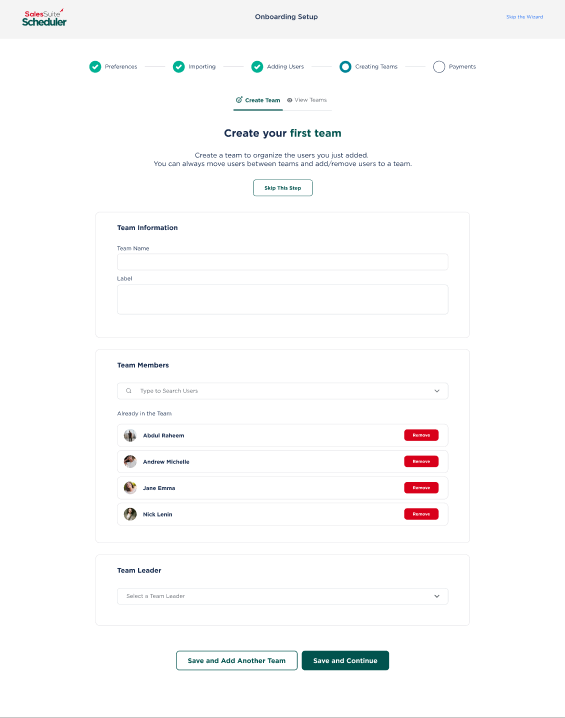
6. After you save and continue, it is now time to create your own team and organize the users you have already added, by clicking on ‘Create your Own Team’. You can add or remove users later on as well. If you are creating a team, you can add your own team title and then select your members. You can choose to have either a larger number of team leaders or a larger number of teams if you go with this option. It is possible to have ten people on 'Team 01' and two people on 'Team 02', respectively.
7. To create your first team, you must add information once again, such as a team name and a team label. You can then add your team members that you have already input by searching for them in the search bar provided. Add your preferred authority level for your users by selecting one or more team leaders. You can then ‘Save and Add Another Team’ or ‘Save and Continue’.
8. You can view your teams in ‘View Teams’ mode, which should look something like this in your mobile application, depending on how many teams you have created:
And like this on your web application:
Remember, if you have selected the business package and are making teams for personal use, they can serve as a way to distinguish between, say, friends, family, and gym class buddies.
9. Once you have finished adding your users and teams, you can choose to add your payment details, or skip this step for the time being
10. You have completed the onboarding step and are ready to start using Scheduler!
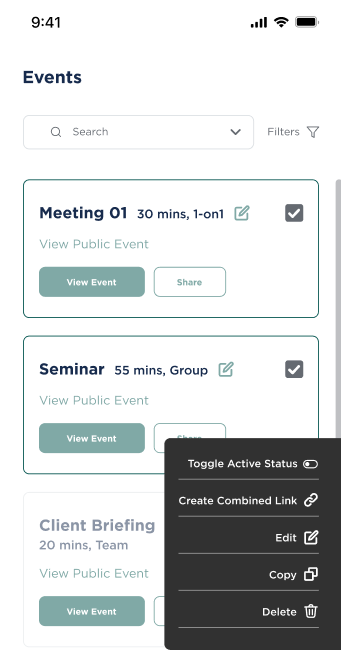
Events
1. Now that you’re ready to start, it is time to create your first event type by clicking on ‘click here’ to add a new event.
2. Scheduler’s communication types and event templates can vary from meetings, seminars, and client briefings, depending on which type of meeting you want to create.
3. You can select your event type and look at different options to configure your meeting settings. You can find that option here:
4. Next, you must decide what you would want your event type to be. According to what you have planned, you can select from Scheduler’s three types of events: One-to-One, Many-to-one, and Public Event. Once again, if you have selected Scheduler’s personal package, you are entitled to only the one-to-one event type. On the other hand, if you have selected Scheduler’s business package, you are entitled to not only the one-to-one package but also the many-to-one and public event types! But wait, there’s more. When you invite people to a meeting via the Many-to-One event type, everyone's schedules will automatically sync to create a common time slot for all attendees. How convenient! These are your three options:
(i) One to One - One host. One invitee. Let an invitee meet with you by selecting a time slot
(ii) Many to One - Many hosts. One invitee. Meet an invitee with members of your team at the same time
(iii) Public Event - Create a public event with the ability to add payments. Ideal for webinars, training, etc.
5. Once again, start adding information. Input your event name and description, then select the location of your event. You can opt for a physical or online event via Zoom, Google Meet, Microsoft Teams, and Scheduler itself! Click ‘Next’ to proceed.
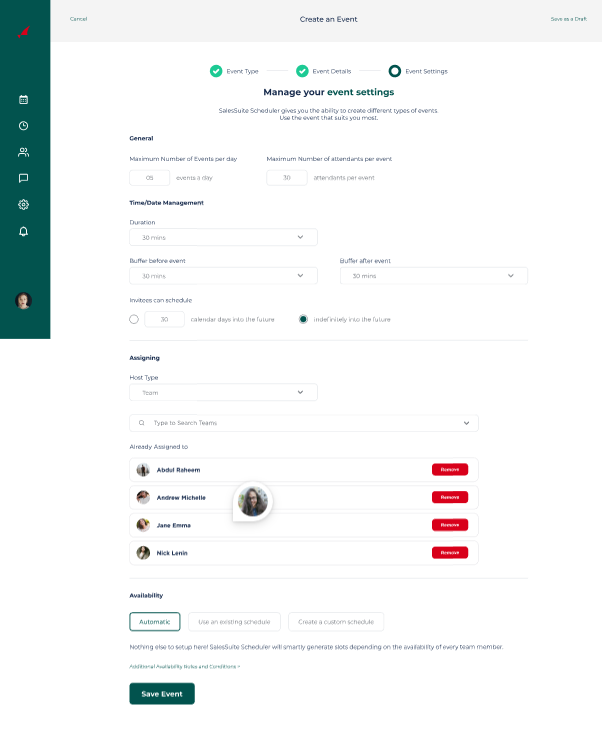
6. You must now manage your event settings, such as time/date management, which includes the duration of your event. If you opt for a team event, you can assign your team members for that meeting, however, this option is available only for Many-to-One and Public Event, event types. Then, choose how your invitees can schedule the event. You can opt for ‘x calendar days into the future’ or ‘identify into the future’.
7. Now, it’s time to select the availability for your event. You will have three options: Automatic, use an existing schedule, and create a custom schedule.
(i) The automatic schedule allows you to synchronize all the schedules of your team members into one and find a common slot for all members for the event.
(ii) When selecting an existing schedule, you must create a schedule for your event prior to creating your event. This can be done in the Availability section in your settings. You must add your schedule details such as name, and description, and schedule a time zone for your event. You can then create a schedule by adding timeslots that you are available on. A buffer time will be added for those who have many events and need time before and after an event to either plan for the event and gather ideas, or perhaps to take down notes of the event. This buffer time before and after will block out another individual trying to schedule you within that time slot. Moreover, if any of your reservations conflict with another one of your events, a section of date overriding will have to be entered manually after selecting your buffer times as a new event altogether, to revoke what has been made before in your previous schedule. To give you a better idea, if a reservation is made on a day that you are unavailable, such as a holiday, the date must be overridden to block out the entire day in this case, under the "Date Overrides" section.
(iii) Creating a custom schedule follows the same steps as the existing schedule, however, instead of selecting from an existing schedule, you will create a brand new schedule, within that setting and screen.
(iv) Your schedule should appear like this in a desktop application:
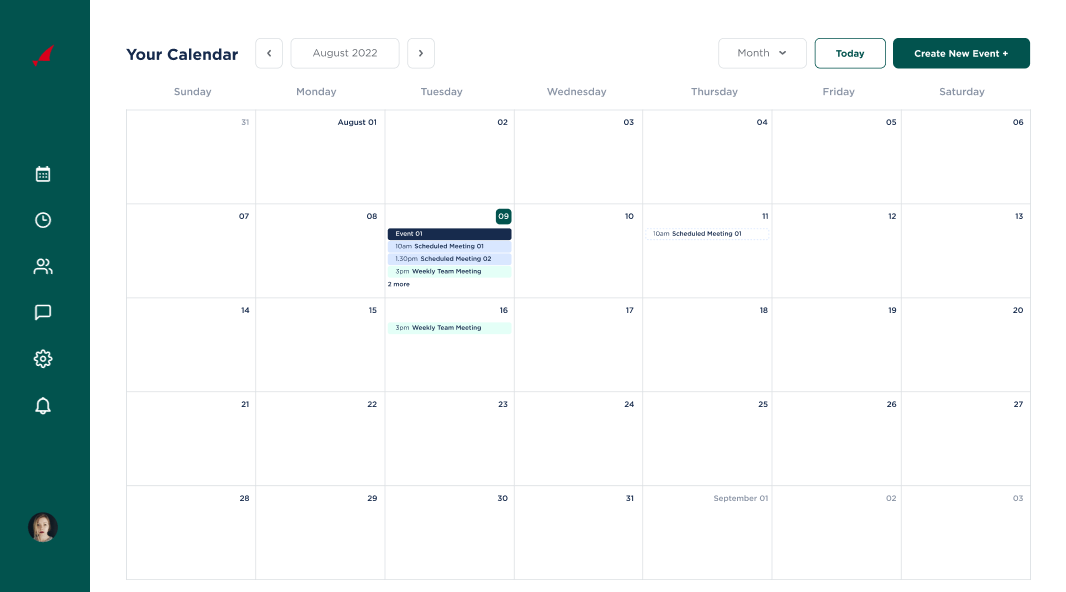
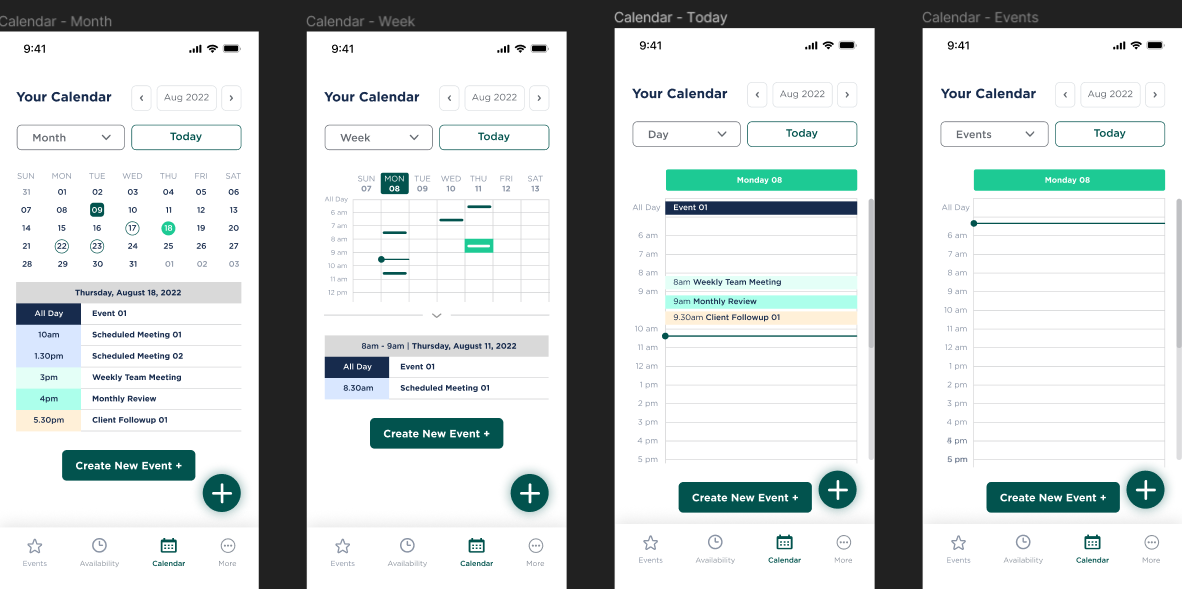
9. Lastly, you can view all your schedules if you have synced your calendars. It is possible also to integrate your schedules with Google Calendar and Microsoft Outlook, and view it in one calendar overview. Dates, times, and event types can be viewed by filtering your calendar on a monthly, weekly, or daily basis, the perfect setup to keep your events organized. Your calendar may look something like this on your web application:
10. You are now ready to pass on your link, share your schedule with invitees, and get booking!
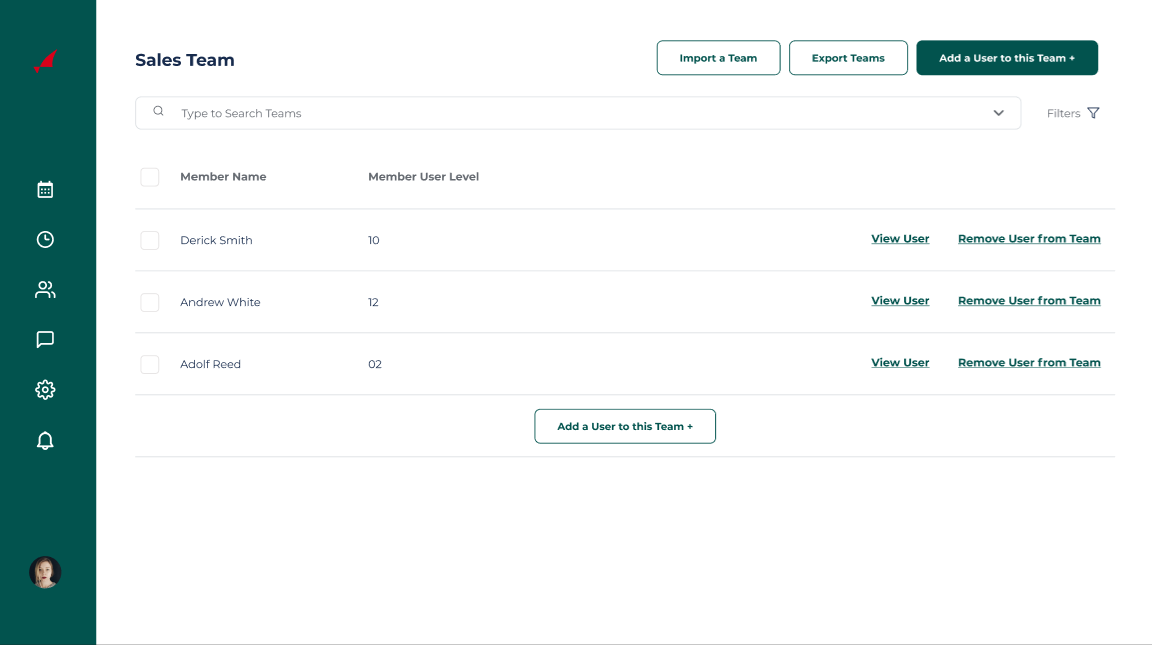
Teams
You can head on over to your ‘Teams’ tab on your web application to view or create your teams. When viewing a particular team, it may look something like this:
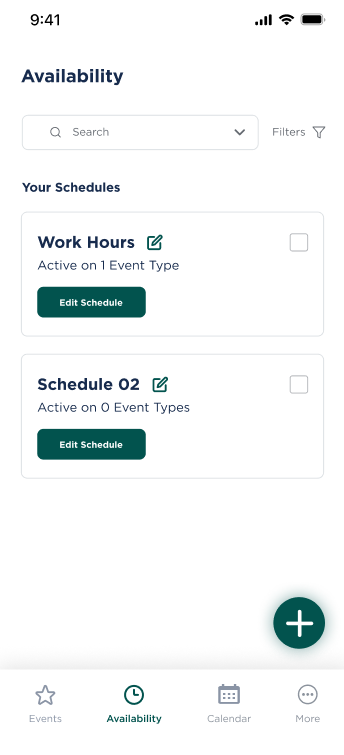
Availability
1. To organize your availability on Scheduler you can click the clock icon below on your home screen on the mobile application, and the navigation/sidebar on the web application.
2. Here, you can view your upcoming schedules or events. It should look like this on your mobile app:
3. Click on a schedule you’d like to edit to check or change your availability. You can choose to edit, copy, or delete this schedule.
4. You can create an event for each schedule if you have not already, and assign them to a specific event. Here, you add a schedule name, a schedule description, and a schedule time zone. Then click ‘Next’.
5. View your schedule settings for every day of the week and add or delete certain hours of the day you are available. In this view, you can once again see the ‘Date Overrides’ section.
6. You can also select to ‘Copy’ a certain time allocation and add it to your preferred day of the week.
Notifications
Under your Navigation tab on your web application, you can view all your notifications and alerts with regards to Scheduler
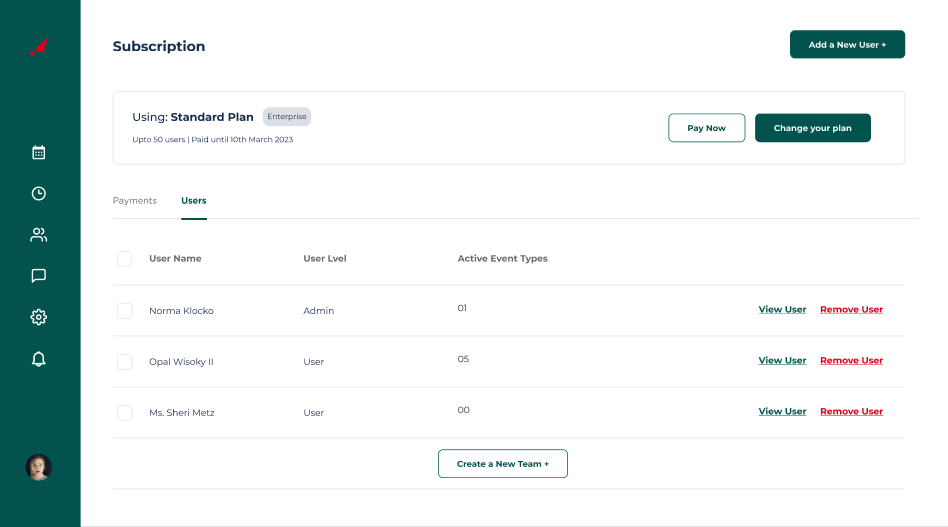
Subscriptions
Once again, your Navigations tab can also let you view your subscriptions and payment plans. View your payment history here, or even choose to change/upgrade your payment plan. When checking your plan, you can also view or remove users that are not vital under your plan. In your web application, it will look as follows:
Users
1. After setting up your account, if you wish to add any users, you can do so seamlessly under the ‘More’ icon on your home screen on a mobile, and under the ‘Navigation’ bar in the web application.
2. By clicking ‘Click here’ to add new users, you can view all the existing users you have previously input, and add new ones as well.
3. You can select existing users and edit or view them.
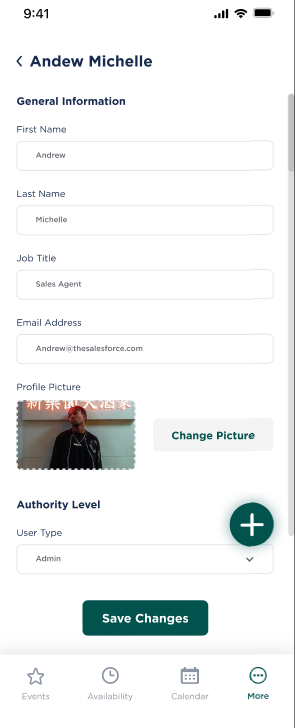
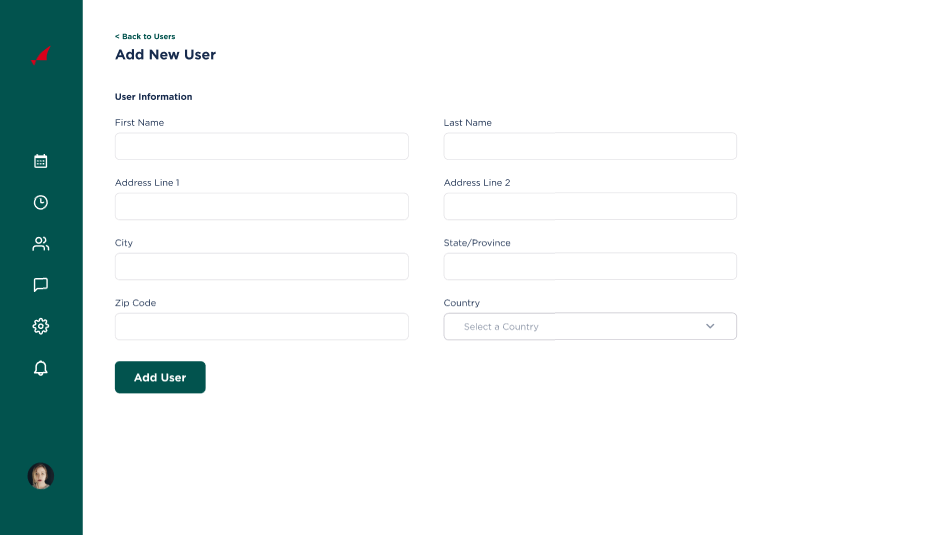
4. You can click on the green addition sign to add a new user on the mobile application, or head on over to the notifications on your web application, and input general information as before, to create a new user. It will look as follows on the mobile application:
And like this on the web application:
My Profile
Under the ‘More’ icon on your home screen, you can view your own personal profile and settings and edit your information if you wish. The same general information settings that were used to add your users, will also be used to configure your own profile settings. You can save your changes accordingly.
Settings
If you wish to edit your own date and time settings, you can do so as well under the ‘More’ icon on your home screen. With this, you can change your time zone, time format, and date format, along with your currency under ‘General Settings’. Click ‘Save Changes’ if you choose to make any edits.
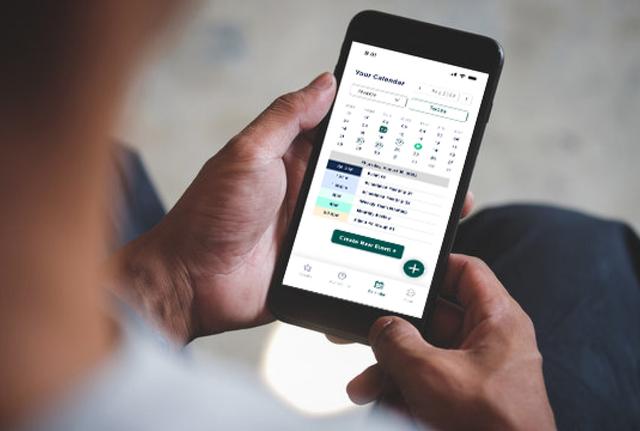
Calendar
To view your schedule after creating your events, click on the ‘calendar’ icon at the bottom of your home screen. You can view upcoming events through a calendar view, which you can filter according to ‘Day, ‘Week’, ‘Month’, and ‘Events’. It will look as follows on the mobile application:
Ready to invite your members?
If you wish to now invite your members, to book their time slot with you, as an admin, you can do so as follows:
1. Share your link with your invitees so they can select their preferred duration of the session. This can be a 30/45 minute meeting.
2. They will be directed to your landing page.
3. Allow them to book their date and pick a time slot and a time zone
4. Lastly, they must enter their name, email, and any additional notes or messages, to confirm the booking!
Categories

> Listen to the Article
SalesSuite Scheduler: Extensive Guide


SIGN UP FOR PRODUCTS
Subscribe to our Newsletter
Stay up to date with latest news, announcements and articles.
Support
The Application Suite
that helps you sell better!