SalesSuite Omni-Com: Step-By-Step Guide
Product
Read through this guide on how to use SalesSuite Omni-Com.
By
TWC User
11/20/2023, 12:00:00 AM
By
TWC User
11/20/2023, 12:00:00 AM
Welcome to the SalesSuite Omni-Com Guide, your comprehensive resource for achieving seamless omni-channel sales success. In today's fast-paced business world, customers expect to interact with brands across multiple channels, and SalesSuite Omni-Com is the solution to help you meet those demands.
With SalesSuite Omni-Com, you can streamline your sales process, enhance customer experiences, and ultimately drive revenue growth. Let us walk you through the key features and benefits of SalesSuite Omni-Com and best practices for integrating and utilizing the platform within your sales strategy. Whether you're new to an omnichannel platform or looking to optimize your existing efforts, SalesSuite Omni-Com is the tool you need to take your sales to the next level. So, let's dive in and explore the power of omni-channel marketing with SalesSuite Omni-Com.
1. Login/Sign Up
To access SalesSuite Omni-Com, go to the website and click the "Sign Up" button. You'll need to provide your basic information, including your name, email address, and company information if you wish to create a company profile or your personal information if you wish to create a personal profile. Once you've created an account, you can log in to the platform using your email and password.
2. Onboarding
After logging in, you'll be prompted to finish the onboarding process for SalesSuite Omni-Com, a tool that allows clients to send bulk automated communications to customers imported from the SalesSuite main domain or manually logged.
2.1. Bulk Contact Imports
You can now import your data via existing data or manually from within the app! Import contacts to either all the contacts, to a new group or to an existing group.
After that, make sure to include your users.
2.2. Integration with Scheduler
If you have already signed up for SalesSuite Scheduler, a tool for seamless and faster communication between clients, friends, or family from different time zones with a quick schedule synchronization and a time slot selection, you can integrate your users through that or choose to add new users manually. This is accomplished simply by entering the user's general information and user type. The onboarding process is intended to ensure you have everything you need to use SalesSuite Omni-Com effectively.
3. Automated Workflows
Experience hassle-free communication with automated workflows. Sales Suite Omni-Com allows users to pre-design workflows for routine communication based on triggers. Trigger messages are automated messages that are sent to customers when they perform a specific action, such as making a purchase or abandoning their cart.
You can simply create a workflow according to your business. The steps are simple.
1. Give a name for your new workflow.
2. Assign the workflow to contact groups.
3. Create the workflow with an initial trigger and continue by setting delays and reactions.
4. Save the workflow.
Creating the workflow for contact groups is where things get interesting. You can customize each group's trigger, delay, and result messages, which will be automated upon creation. Delay messages are messages that are sent after a specified time delay, such as a follow-up message a week after purchase. Result messages are messages that are sent after a customer takes a specific action, such as leaving a review or referring a friend. You can view all the workflows in your groups and get a clear overview of each customized trigger, delay, and reaction.
4. Campaigns
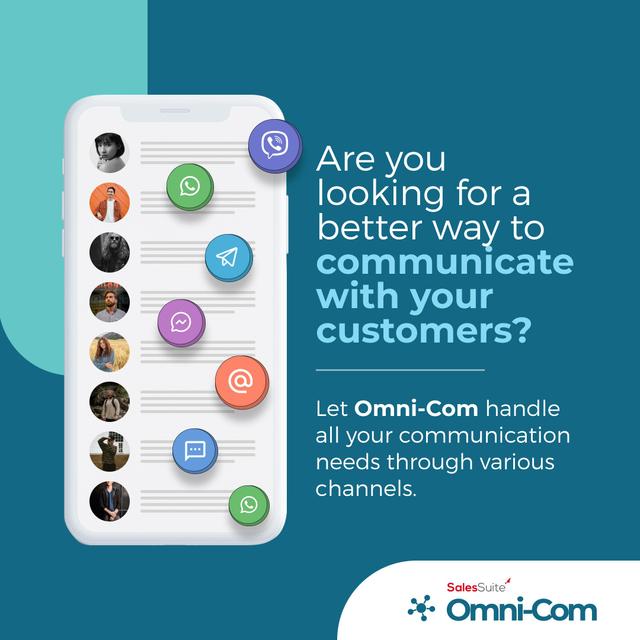
With Sales Suite Omni-Com, businesses can run direct marketing campaigns smoothly. Omni-Com provides the users with a clustered inbox where they can monitor the campaigns run in each channel (email, WhatsApp, Telegram, Messenger, Viber and SMS) and task history. You can label and star your emails/ messages within one platform, making it easy for you to access. In addition to that, Omni-Com makes your life way easier by suggesting automated replies to customer inquiries so you do not have to worry about thinking and typing responses to each and every similar message.
The following content will guide you through how to create a campaign with Omni-Com with five simple steps.
4.1. Platform
The first step of creating a campaign is to choose the platform. You can choose between the platforms that your customers are active such as emails, Messenger, WhatsApp, Telegram, Viber or SMS and then add the workflow. Here, you have the option to either continue without a workflow or add a workflow by selecting an existing workflow or designing one specifically for the campaign. Once you select the workflow and set the trigger points, you are good to go to the next step.
4.2. Creation Method
In this step, you can create a new message/ email or select a saved template.
Templates are pre-designed messages that can be customised and sent automatically to customers based on specific triggers.
SalesSuite Omni-Com provides a library of templates that cover a variety of scenarios, such as welcome messages, abandoned cart reminders, and post-purchase follow-ups. You can also create your own templates and customise them according to your needs. A template may vary from the layout to the content to the actual customer need. Once the templates have been created, the client may also group these templates into folders that can be accessed according to the needs of the customer.
To create a template, click on the "Templates" tab and select from the sample templates provided or create an entirely new one. Choose the type of message you want to create and follow the prompts to design your message either for email, SMS or via any instant messaging application such as WhatsApp, Viber, Messenger, or Telegram.
4.3. Recipients
This is where you select the target audience that your campaign should be sent to. SalesSuite Omni-Com allows you to manage your customer groups and send automated messages to them based on specific triggers. To add the recipients, select the contact groups you target, manually add the email addresses or import the contact list through an Excel sheet or CSV file. You can save the manually added contacts as a new contact group on the same page.
When creating a group, you must input certain information such as a group name, adding members, and, most importantly, the criteria and demographics of the group, like product features and which region you want your group to be set in.
With SalesSuite Omni-Com, you can also merge your groups under the “Contacts” tab. You must simply select the groups you want to merge and can view the team members within each group to double-check whom you are merging.
4.4. Campaign Content
Now, you are almost ready to launch your campaign. In this step, you are able to do the final touch-ups to your message. If you wish to edit the template and the content, add/ change the subject of the email/ message, you can do all that.
If your content is ready to be sent, then simply go to the next step.
4.5. Launch
This is the final step of launching your direct marketing campaign. There are two campaign launch options: to send quickly or to save and launch. If you wish to save the changes for future use, you can save the whole campaign and launch. But if you think this campaign would be one time, you can simply launch it without saving. Whatever choice you make, your campaign is now launched, and now it’s time to wait and see how it goes!
SalesSuite Omni-Com provides its users with an Activity Log, where all the analytics and reports one may need after launching a campaign. The reports reveal in detail information about delivered emails and messages, failed and skipped messages, each campaign performance and everything in one place!
5. Settings
In the "Settings" tab, you can customize various aspects of your SalesSuite Omni-Com account, such as your general settings like your currency and date/time zone, or your account information, user settings, email configuration, and verified emails. So, if you want to change anything around after creating your account, no problem!
Overall, SalesSuite Omni-Com is a powerful online marketing tool for communication workflow automation. You may boost sales, enhance customer satisfaction, and facilitate business expansion by making use of its unique features and functionalities!
Categories

> Listen to the Article
SalesSuite Omni-Com: Step-By-Step Guide


SIGN UP FOR PRODUCTS
Subscribe to our Newsletter
Stay up to date with latest news, announcements and articles.
Support
The Application Suite
that helps you sell better!